Anyone that has tried to implement outlines in a game engine has probably tried the mesh based approach - render the mesh you want outlined again with a backface culled shader that offsets vertices along their normals.
There is one notable problem with this approach however - split vertex normals. Any hard edge on the original model will split apart when the vertices are offset along the normals, creating gaps in the outlines and potentially reducing it to a spiky mess.

This is a problem that I've encountered before, so I decided to dedicate some time to finding solutions to it - here are three!
All the scripts in this blog can be found on my Github page here
These solutions are intended for a Blender - Unity pipeline, but the principles are broad enough that they should be applicable to any DCC - Engine pipeline. A breakdown of the basic Unity outline setup can be found at the bottom of this blog
Solution 1: Pack normals into vertex colours

Since we have no way of smoothing normals within the shader (each vertex only knows about it's own normal vector), one solution is to bake the smoothed normal direction into another piece of vertex data - my first port of call for this was vertex colours, since they're natively Vector4 and easy to manipulate.
I decided to implement this with a python script in Blender. Ideally this would be part of a custom exporter.
Customer exporters are super easy to get started with since Blender's FBX exporter is actually a python addon itself, so it's possible to just fork the existing one and custom features to your heart's content.
The script is fairly simple - regardless of smoothing groups we can access a single vertex normal through bmesh (a Blender mesh api that provides a wide range of functionality), so we just write that value to each loop (face corner) linked with the vertex.
The only other thing we have to do is remap the normal value from -1 to +1 range to 0-1 range (to fit in the acceptable range for vert colours). It's also important that you export the mesh with Linear vertex colours as sRGB will mess up the values.

Blender Python code for packing normals into vert colour
There is one final adjustment to get the shader to work properly in Unity: Blender uses a different co-ordinate system, so to get the axes to line up we need to manipulate the baked data. This process could be done in the shader, or better yet the python script to avoid unneccessary shader logic. The mapping is:
- Blender X = Unity -X
- Blender Y = Unity - Z
- Blender Z = Unity Y
Of course, the value range needs remapped back to -1 to +1, after all the inversion and swizzling.
Unity shader setup
Pros:
- Can integrate seamlessly into an exporter.
- Single mesh solution is clean and avoids paying skinning cost for skeletal meshes twice.
Cons:
- Uses three vertex colour channels. Could probably pack it into one, but that has potential for precision issues.
- Vertex colour is a very useful tool for masks so losing it is an issue.
Solution 2: Pack normals into UVs

Instead of using up the vertex colours, why not use one of the many UV channels we have access to?
The caveat to this solution is that it's generally not possible from within DCC programs. Blender internally, and crucially, the FBX format itself, treats UVs as a Vector2 and we need three components for a normal. You could split it across two UV channels, but it's definitely easier to handle this one in Unity. The solution I picked was an asset post processor script.
The full script can be found here, but I'll provide a quick summary of it.
- On import of a model in defined directories, all the submeshes are looped through. (Use whatever condition makes sense for your project)
- A temporary copy of the submesh is made.
- The list of vertex coordinates is de-duplicated to remove the extra vertices created by split normals, uv seams etc.
- Triangles are re-computed using a dictionary to map now deleted vertex indices to the indices of their surviving twins.
- The normals are recalculated and then stored in the UV3 channel of the original mesh.
Pros:
- Single mesh solution
- Uses one of 8 available UV channels, unlikely to hinder any workflows
- Unity side solution works for any mesh, no need to do any prep
Cons:
- Shadergraph can only access UV0-3 so 1/4 of those channels get used up
Out of the three, this is the most well rounded solution in my opinion.
Solution 3: Generate a duplicate outline mesh

Another alternative is to simply use a different mesh as the outline mesh.
All we really need is an exact duplicate of the mesh with smoothed normals. This could be implemented on either side of the pipeline.
To get this working from the Unity side, all we need is a small extension to our previous asset postprocessor script. Instead of using the duplicate mesh as a temporary working copy, we instead save it out as a mesh asset, and add a new object to the main assets prefab, with that mesh and the outline material assigned.
There are a couple downsides to this - firstly, (as far as my research took me) it's not possible to parent the new mesh filter to the original asset. This results in them floating around as unlinked assets, which can result in duplicates if meshes change name and is generally less neat. Secondly, AssetDatabase.SaveAsset is deprecated in asset post processors in Unity 6. The solution is to hand the mesh off to a later stage of the import process and save it out there, which should still work but requires a bit more effort.
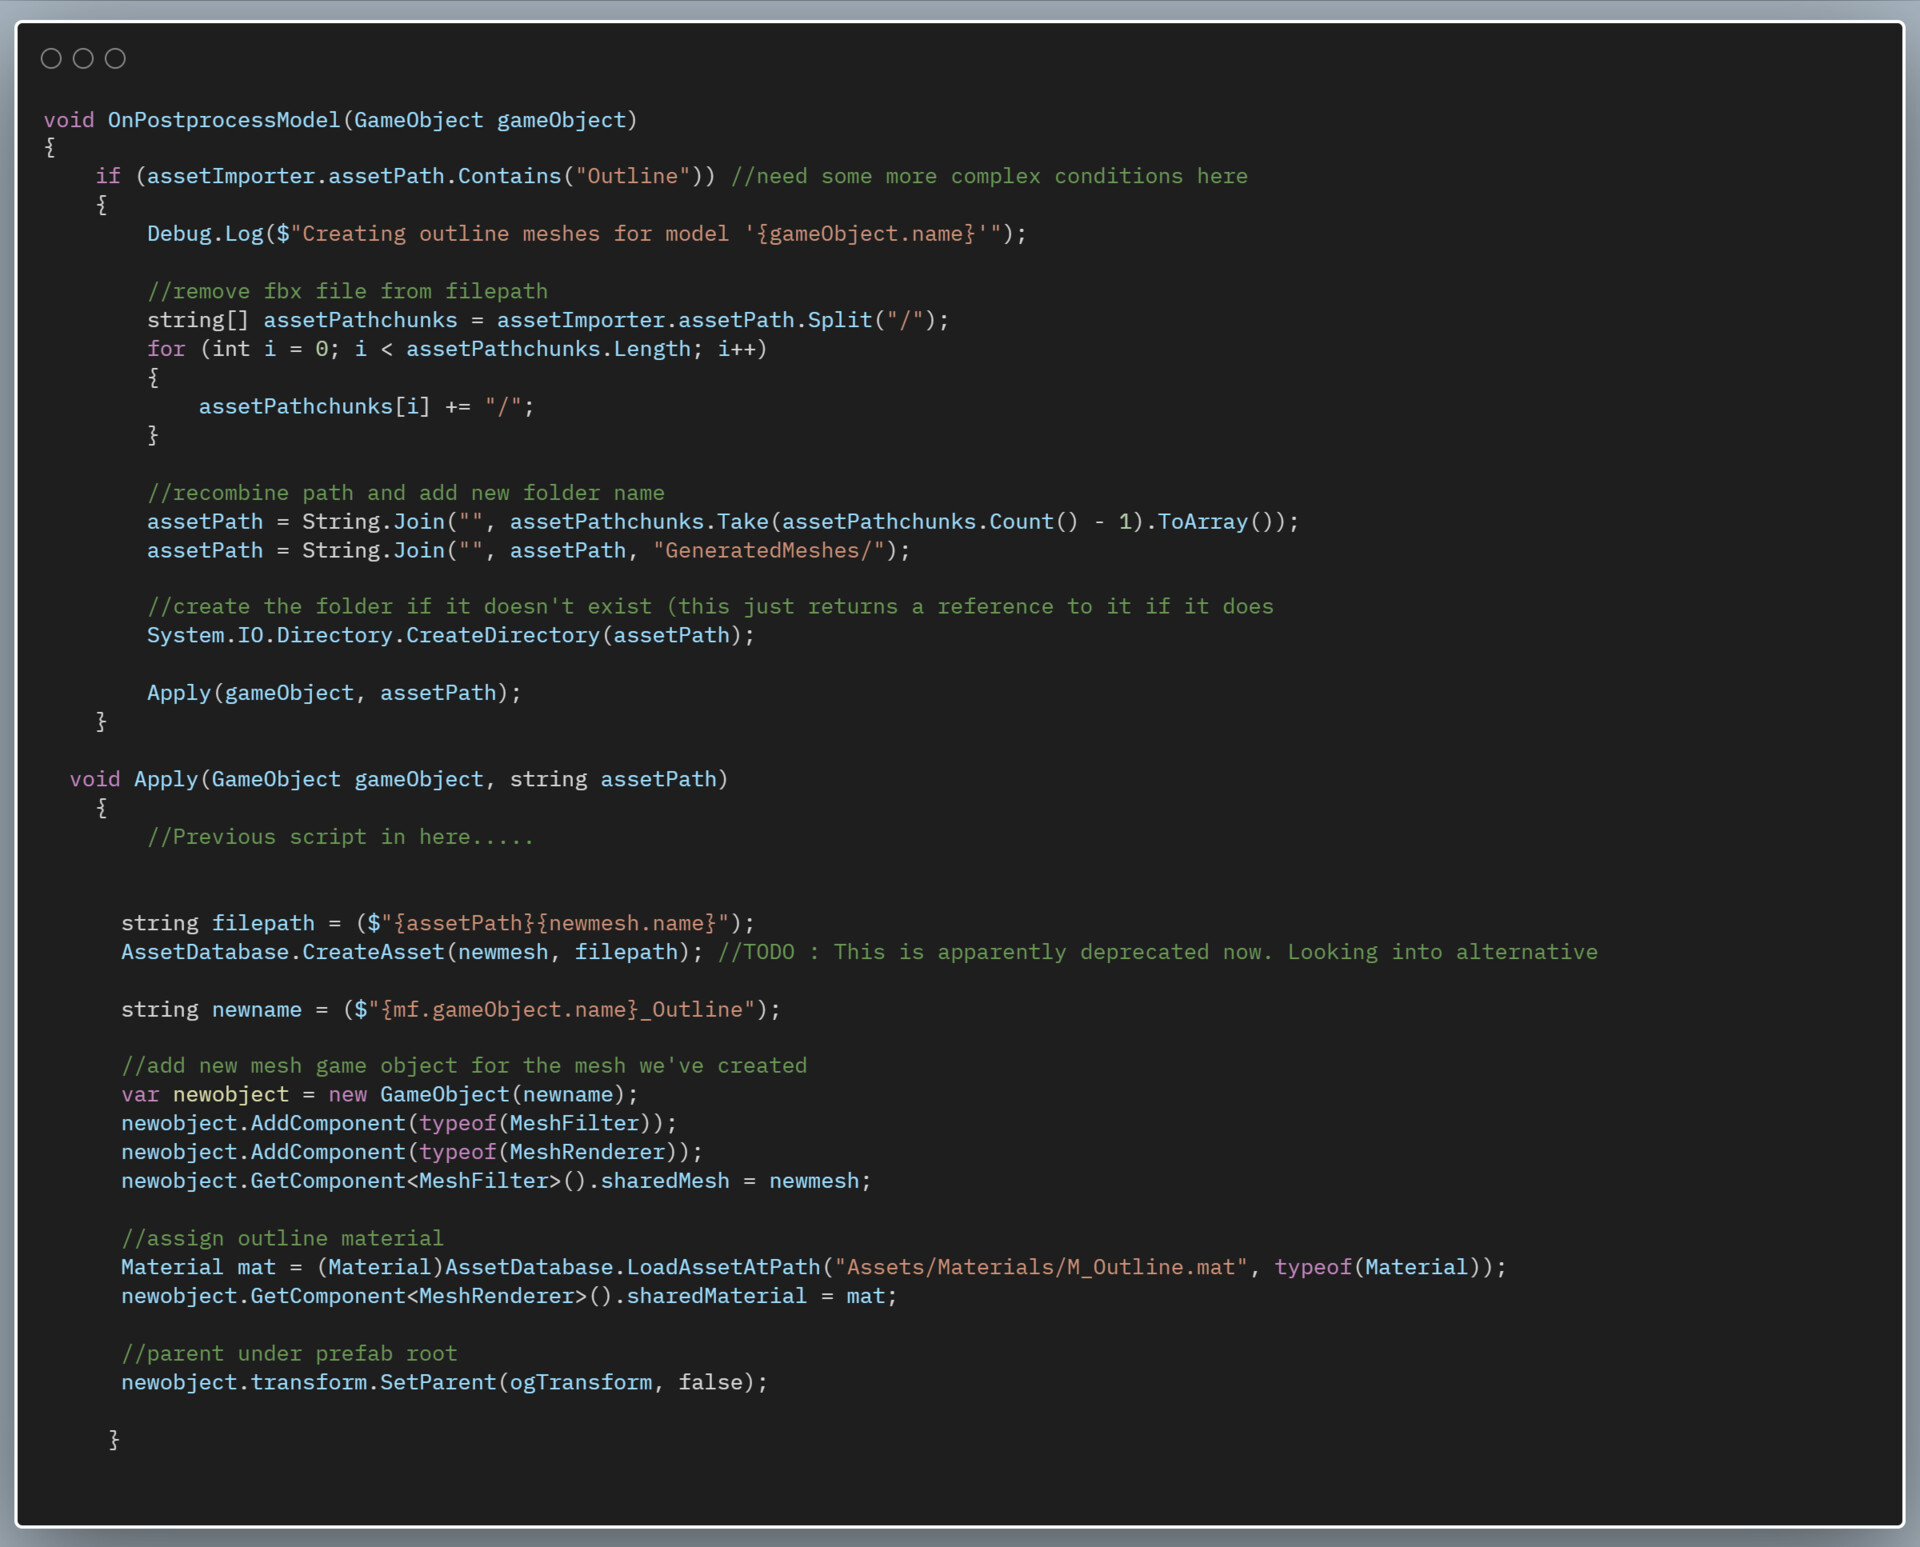
The relevant parts of the post processor script
For the Blender version, this is another function which is best inserted into a custom exporter - that way the outline mesh is generated each time, and doesn't have to persist in the scene. While duplicating the mesh is trivial, ensuring it has completely smooth normals is a little harder.
Around Blender 4.0, the smooth by angle function was changed to add a geometry nodes modifier that accomplishes the same effect. Unfortunately, this makes it quite difficult to cleanly identify the smooth by angle/auto smooth modifier since, to the API, it just looks like an ordinary geometry nodes modifier. To make matters worse, depending on when the file was created, it may have two different versions of this "modifier" - "Smooth by Angle" and "Autosmooth", each of which have differently named parameters. Also also, it's very easy to end up with duplicates of these nodes groups, which will then have .001 appended to their names, and they can even be completely renamed to something arbitrary by any user.
In my script I opted for the simple but heavy handed approach of just removing all Geometry Nodes modifiers from the duplicated mesh. If you're working with geo nodes and need to generate outline meshes for them, a better option would be to look through the node tree for the "Set Shade Smooth" node, which is what causes the problem here, and remove modifiers using that.

This would ideally be implemented in an exporter before the write call, with a matching function afterwards to clean up the generated meshes
Pros:
- Can be implemented fairly easily on either side of the pipeline
- Blender version can give you fine control over which objects receive outlines, and works neatly
- Original object requires no formatting and is unaffected by the whole process
Cons:
- Unity version creates new assets that need tracked
- Adds another mesh object for the game to deal with
- Skinning cost for skeletal meshes is paid twice
Basic Outline Setup in Unity
This section is a quick rundown of how to set up the outline system that is being iterated on here.
Shader

This is the basic outline shader, offsetting vertices along their normals. This will work for meshes with smooth normals

The simplest way to apply the shader is to add an extra material slot to the mesh renderer and add the outline material to it
Render Objects method

A more flexible alternative is to use Unity's "Render Objects" renderer feature. This lets you render objects on a specific layer again, with various overrides. In this instance, we render the cube again with the outline material, more or less the same as the previous method. The advantage of this method (in addition to not having to deal with each mesh individually) is that you can override the shader instead of the material. This carries across all parameters from the original material, which can then affect the outline shader if the parameter names match up.
For instance, if you add a parameter called "Outline_Scale" in both your character shader and outline shader, then use this override method to draw the outlines, changing the parameter on the character's material will affect the outline. This is super useful as it allows granular control over outline properties without having to use duplicate meshes or assign materials to each mesh manually.